

葡萄美酒夜光杯 Chateau Beibei 自酿葡萄酒 完全指南 图片写真
在公元前138年的张骞出使西域时,就有“宛左右一葡萄为酒,富人藏酒至万余石,久者数十年不败”的记载。“瘟之时,取葡萄带青者,其温也。在三五间砖石砌干净地上,做瓷瓶嵌入地中,欲其低凹以聚,其翁可容数者,然后取其葡萄,不已数计,堆积如山 ,铺开,用人已足揉践之使平,却已大木压之;覆以羊皮膻毯之类 ,欲其重后,别无曲药,压后出闭其门,十日半月后 窥见原压低下,以其验也,方入室,众力拼下膳木,搬开而观,则酒已盈翁矣”。
长在山野里的水果,成熟以后会自然脱落,会自然的发酵,后来会变成醋,中间有个阶段是酒。这一切都是自然的,都是微生物的作用。
葡萄也是这样。最傻瓜的方法,买回葡萄不用洗放进坛子里,捏破葡萄,葡萄皮表面的葡萄酶就会发生作用,先密封增加温度以促进发酵地进行,后偶尔放气(酵母把葡萄糖分解为酒精和二氧化碳),不到半月就变成葡萄酒了。
所以酿造简单的葡萄酒是非常简单的,中间也充满了乐趣,你可以体验葡萄如何从鲜食水果变成一杯美酒,品尝发酵中不同阶段味道口感的变化;会有一种控制和创造的快感,味道好过一般30元的葡萄酒,有明显的果香和果酸,适合冰冻后佐餐饮用,或者沐浴完毕以后自恋一番。
心动不如行动,Action!
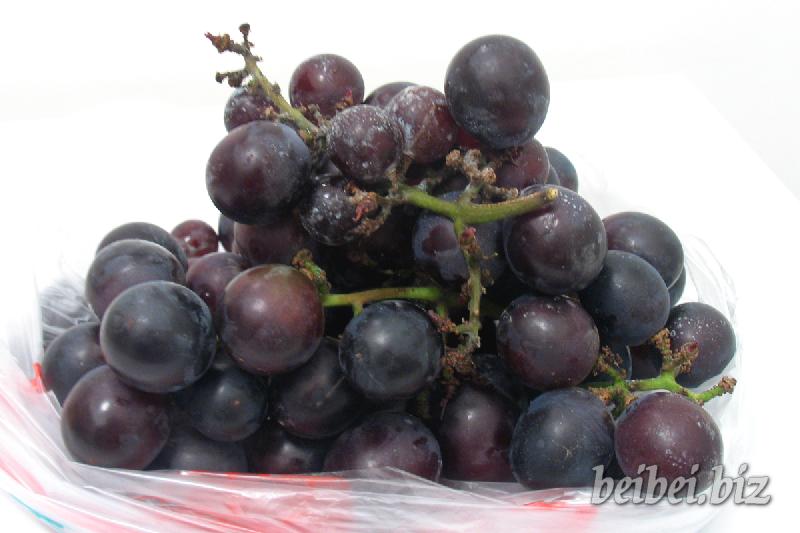
先买回新鲜的成熟葡萄,其实自酿葡萄酒,不一定需要赤霞珠,因为即使是赤霞珠以家庭的设备也体现不出其酿酒葡萄的优势,所以买便宜、新鲜、成熟、卫生的葡萄就好。梦想搞一百斤玫瑰香葡萄来酿葡萄酒。目前只能以巨峰葡萄来酿造了,葡萄表面白色的葡萄酶就是天然的酵母。
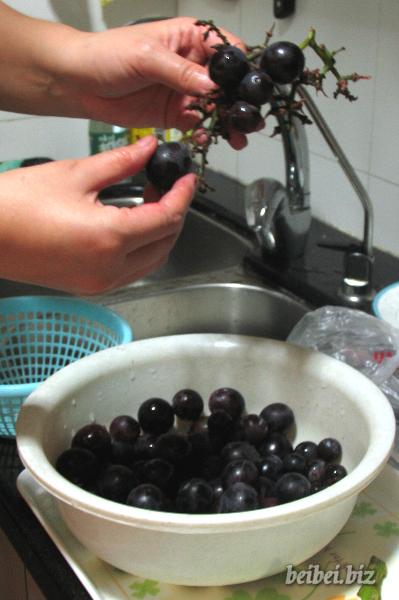
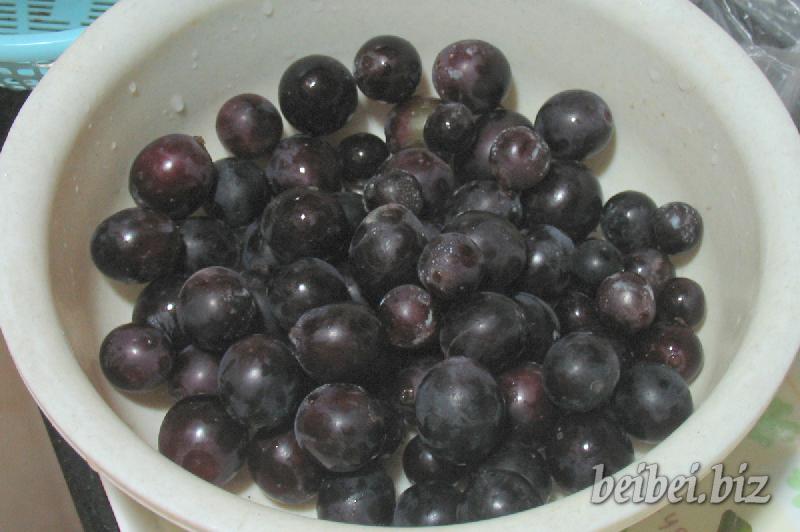
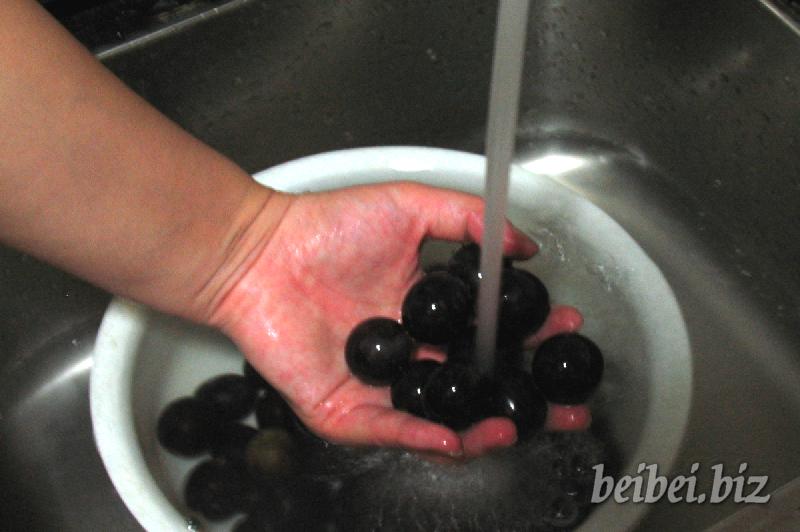
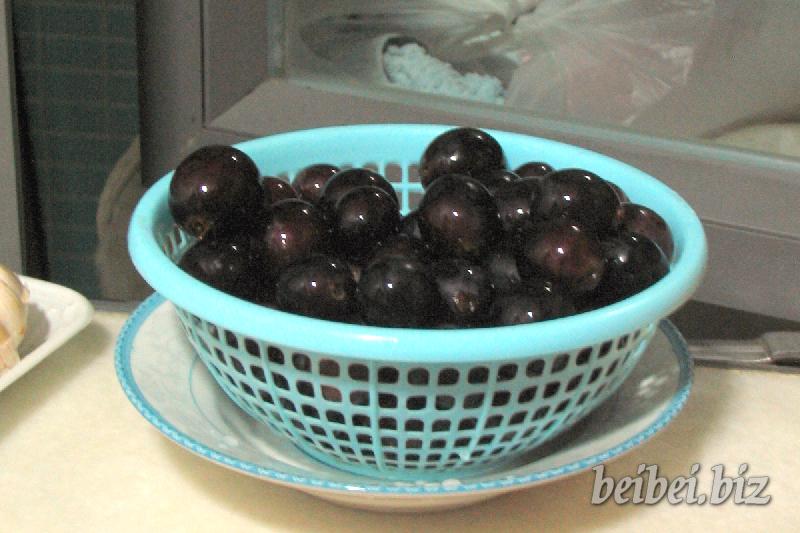
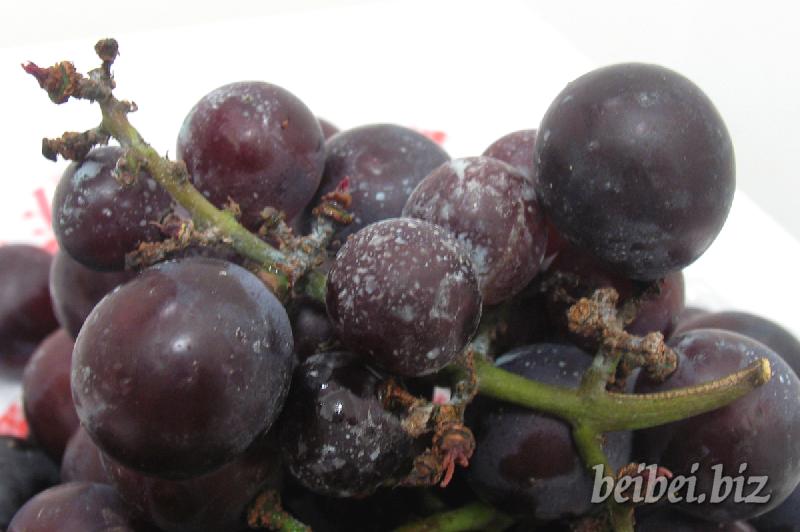
工业酿造葡萄酒都是不清洗葡萄的,保留葡萄表面最多的葡萄酶。但一般鲜食葡萄,卫生状况还是有些令人担忧,安全起见还是稍微冲洗一下。晾干,不要沾有剩余的自来水,个人分析可能是自来水里的氧化物有可能会影响葡萄酶酵母发酵。如果想要强劲一些的单宁酸口感,可以把葡萄梗以后放入发酵。(不清洗的葡萄保留了葡萄表面大量的天然葡萄酶发酵迅速可能10天左右就能酿造好,清洗过于干净的葡萄由于没有葡萄皮表面的葡萄酶只能自然发酵可能需要2个月才能酿造好。)
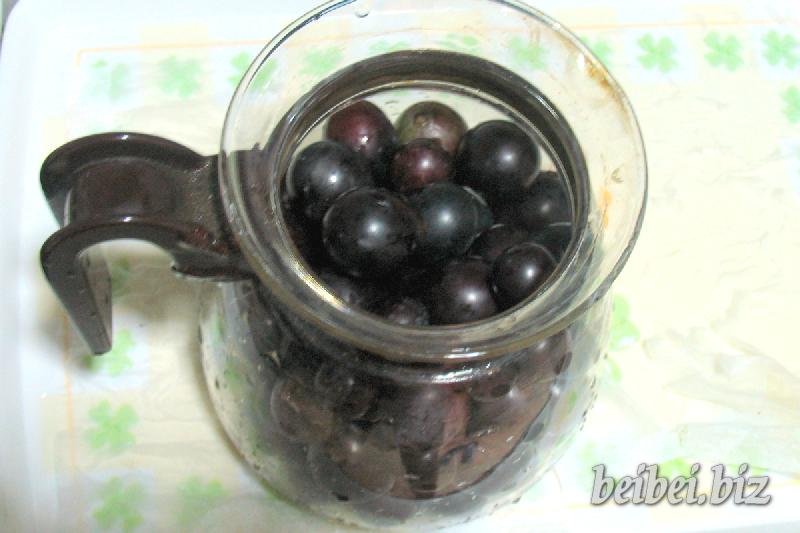
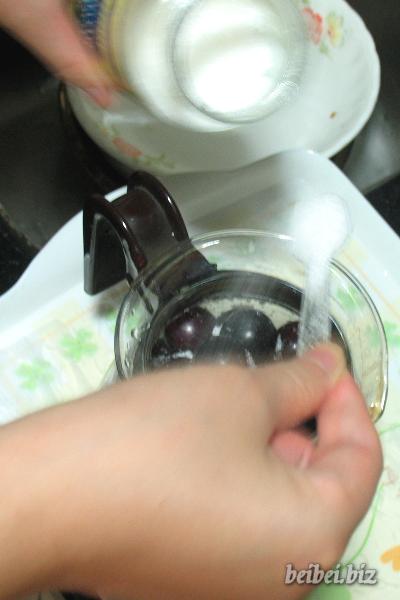
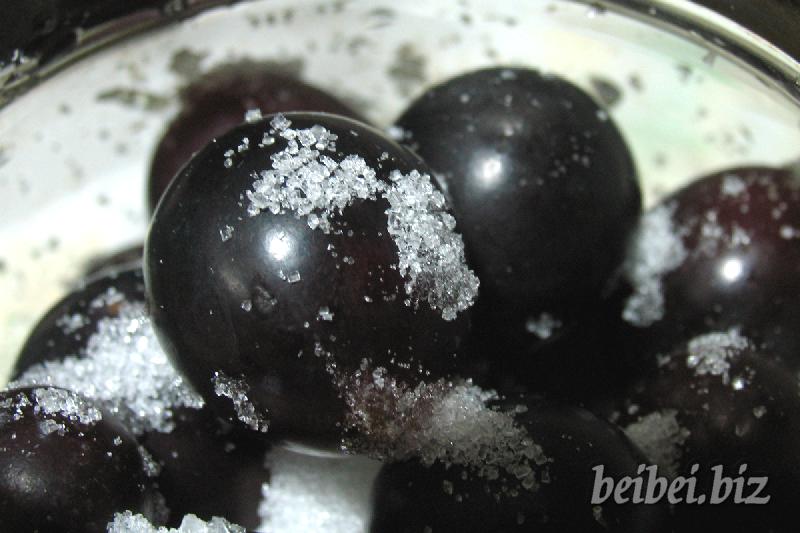
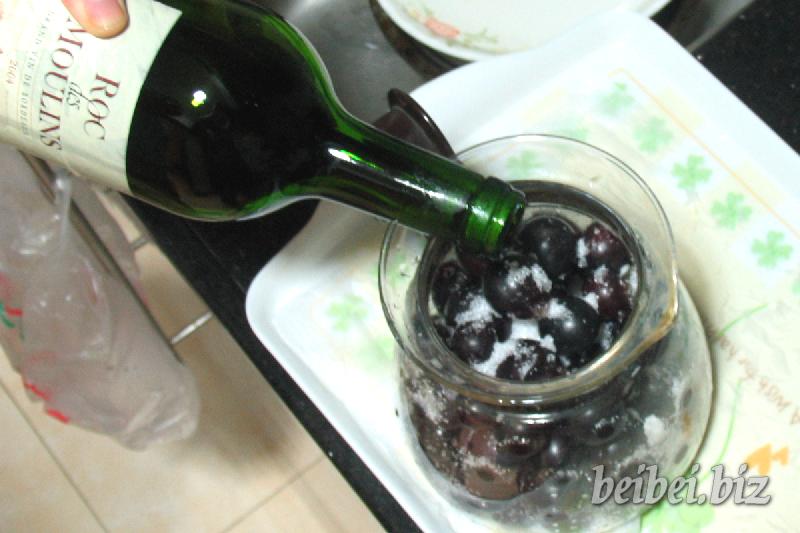
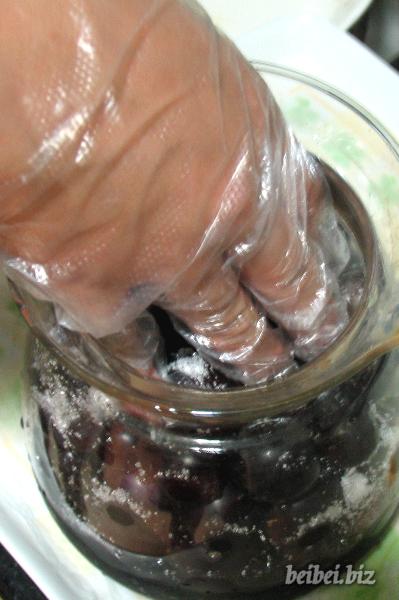
将稍稍清洗晾干的葡萄放入发酵的容器(够大、方便密封),加入糖(弥补鲜食葡萄糖酚含量的不足增加酒精度,每一斤葡萄放二三两白糖),可加入一点点葡萄酒做引(提供更适宜的葡萄酒酵母生存环境、或许残留的酵母作用)。把葡萄捏破,手够干净不戴手套也行,这样手感更好;嘿嘿,如果葡萄多可以用脚。
创新:捏碎以后担心葡萄皮太大不容易浸出单宁酸,用榨汁机把葡萄皮和果肉榨碎了。这样口味更重一些,发酵可能加快一点。
密封,留出至少1/3的容器空间供发酵排气。25~30摄氏度左右,可套一个袋子保温。
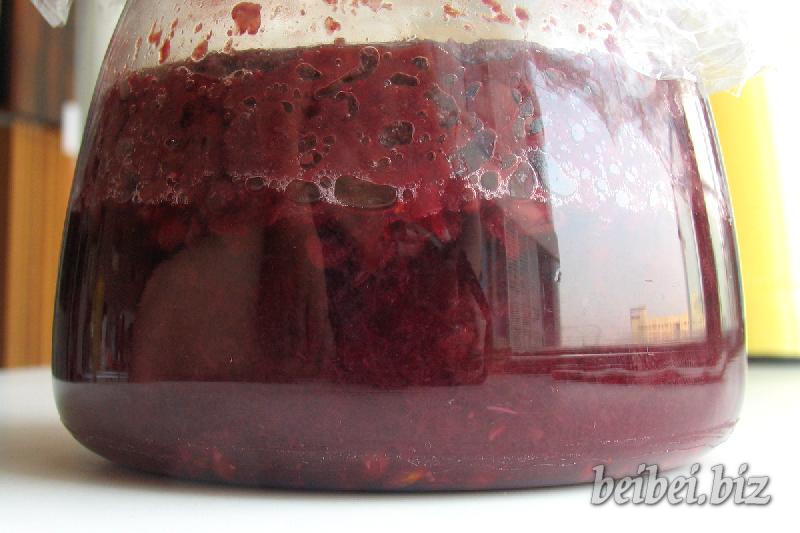
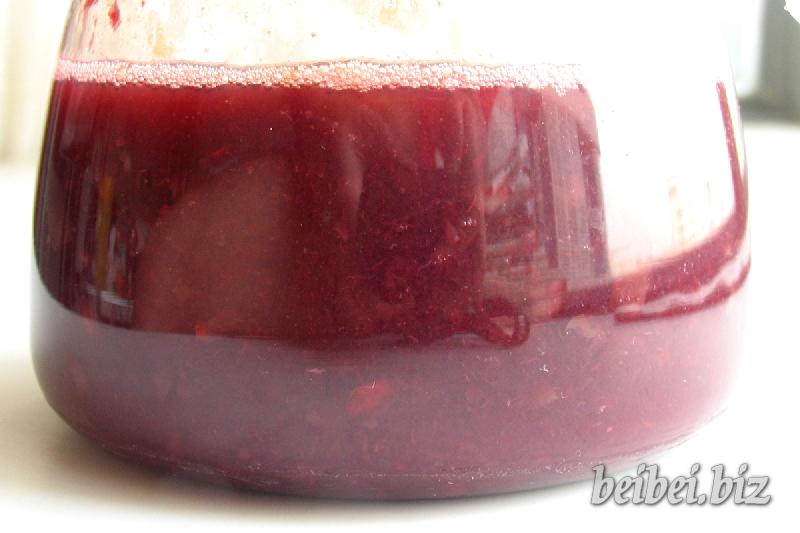
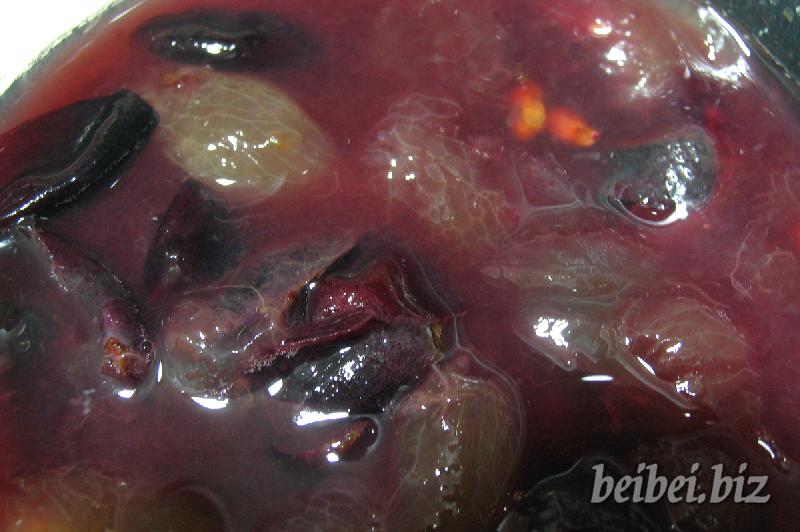
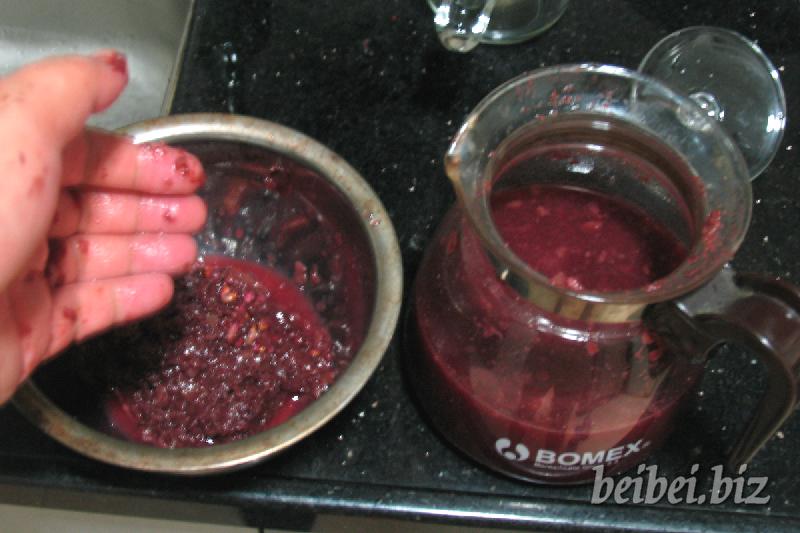
发酵两三天以后,葡萄皮会上浮;为了强化葡萄皮单宁酸的浸去、避免葡萄皮氧化发酸,要经常搅拌一下,把葡萄皮按到葡萄液里去。
发酵五天以后,葡萄皮上浮后葡萄液变得比较清澈;可以清理出葡萄皮,进行第二次发酵。如果有适当的方法一直保持葡萄皮在葡萄液里面,可以一直葡萄液、皮发酵到葡萄酒酿成。
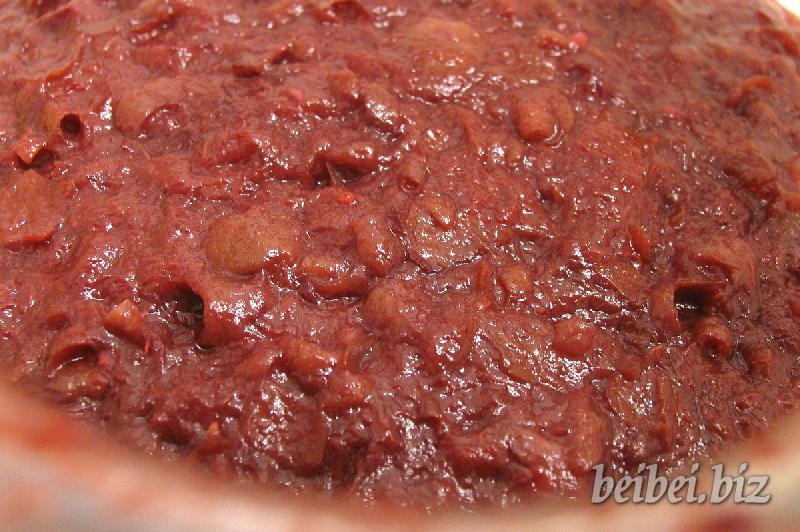
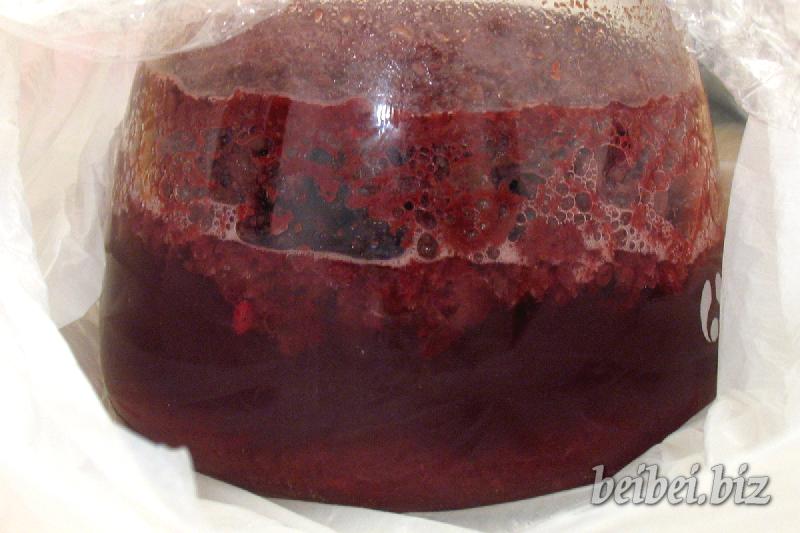
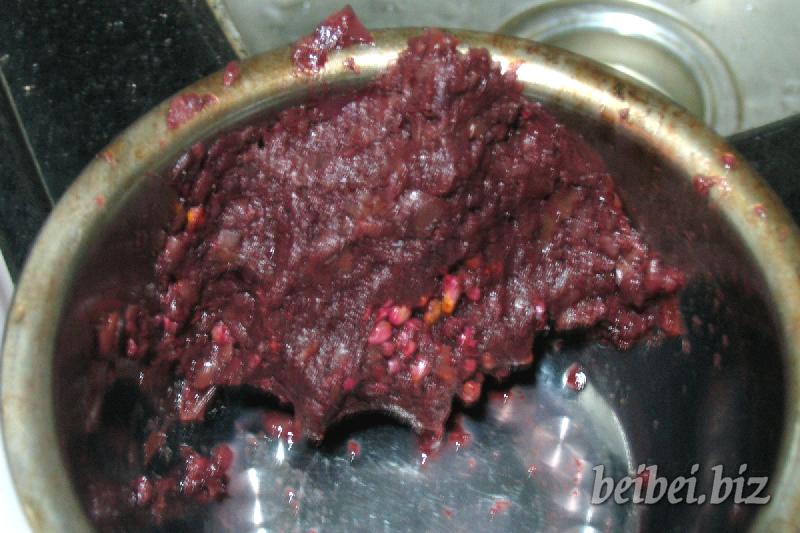
第一次发酵结束后,(打碎过的)葡萄皮的样子。
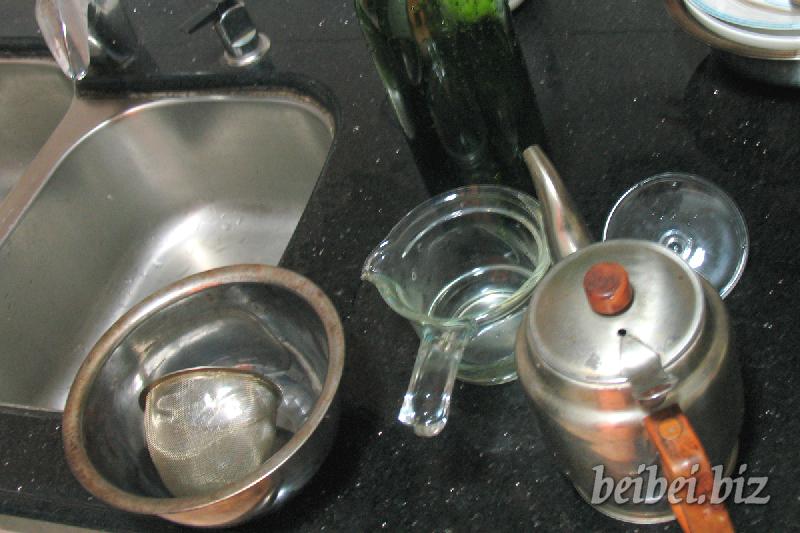
过滤工具,也可以用纱布。
捞出发酵过的葡萄皮、渣。
将剩下的发酵过的葡萄汁倒入滤网。
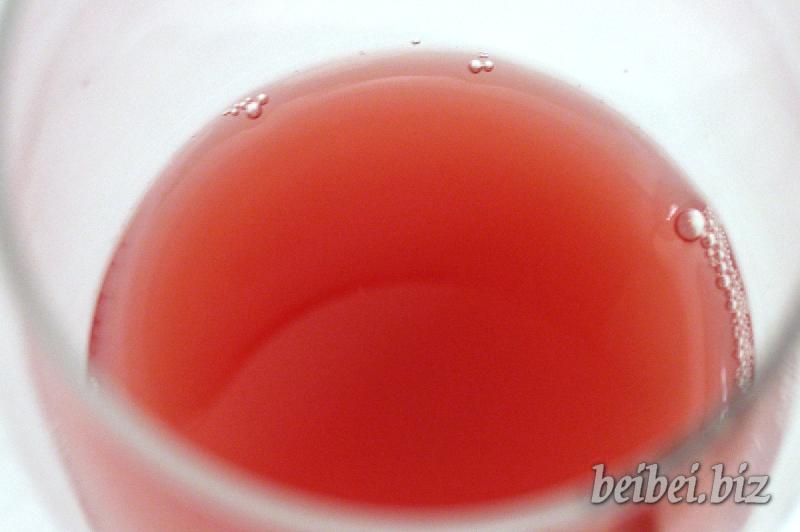
过滤过的发酵葡萄液。
把葡萄皮、渣里的葡萄汁都挤出来,过滤。留下的残渣。
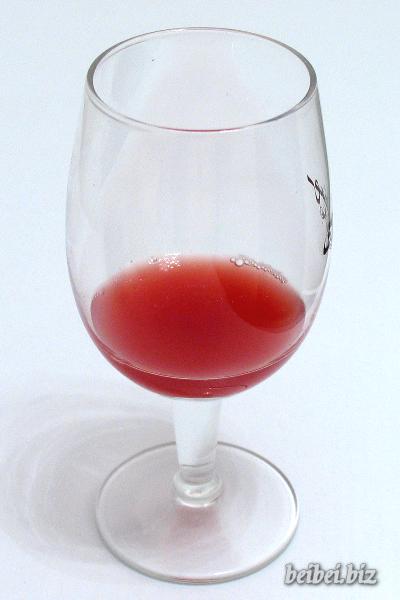
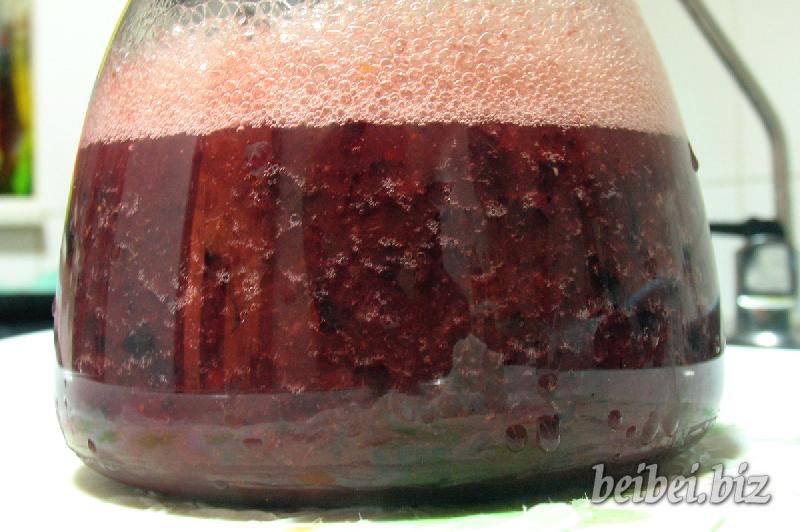
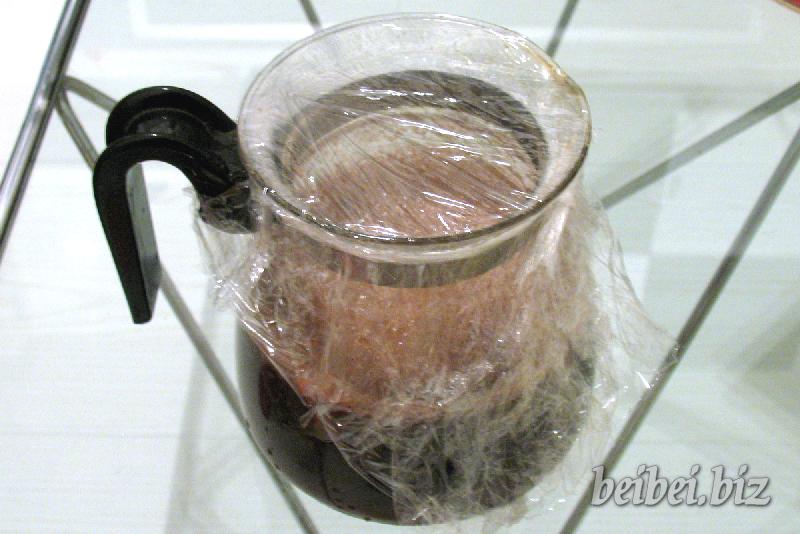
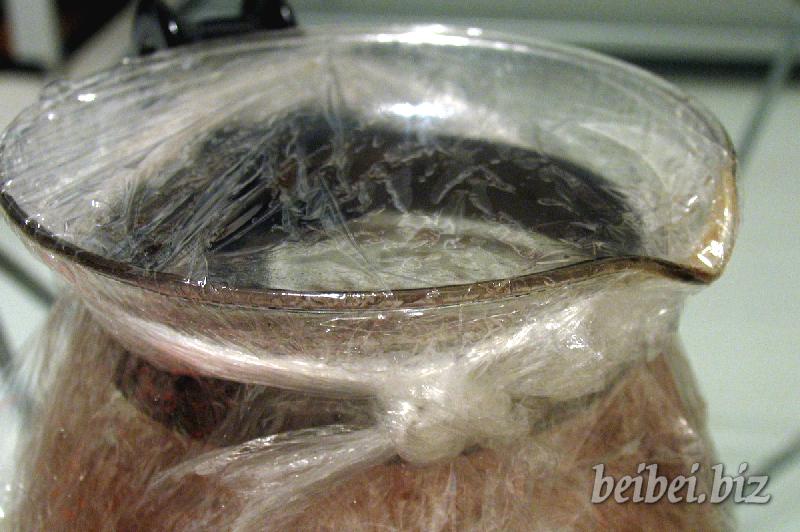
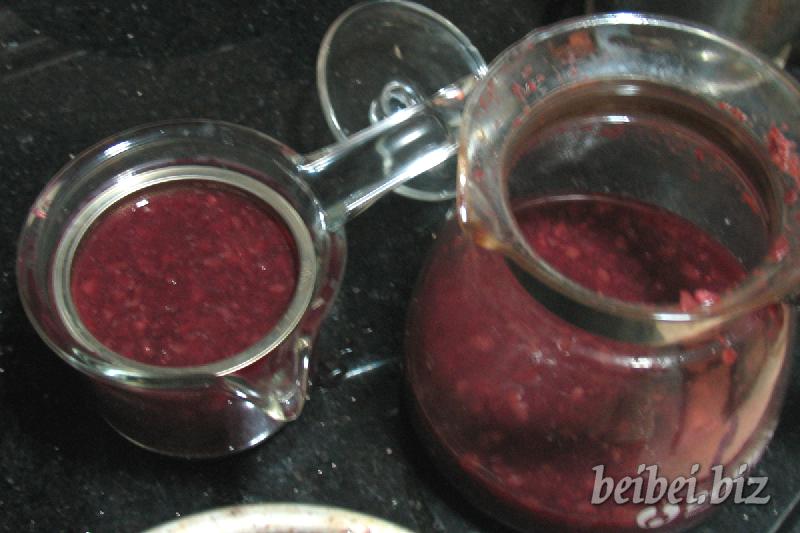
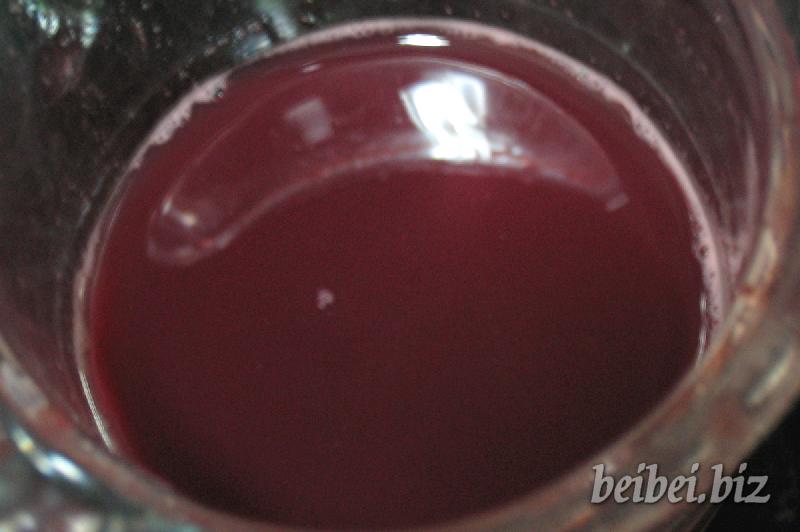
将过滤过的发酵葡萄液,装入瓶中,进行第二次发酵(除去葡萄皮继续发酵)。不能密封,要经常透气,此时发酵会产生大量的气体。可以每天尝一点,感受发酵变化的乐趣;开始比较浑浊,气泡较多,喝起来有一些气泡酒般刺刺的口感,慢慢的变得比较清澈。7~14天后,再过滤一次,装瓶保存;如果冰冻发酵会中止、酵母沉淀,酒体更加清澈游人。
有明显的果香和果酸,适合冰冻后佐餐饮用;或者沐浴完毕以后自恋一番:端着一杯冰冻的自己亲手酿造的充满果香、果酸香甜葡萄美酒,这里面有一种葡萄酒皇拉菲堡也无法提供的diy过程美。
6 条对“葡萄美酒夜光杯 Chateau Beibei 自酿葡萄酒 完全指南 图片写真”的回复
自己家庭酿红酒很简单
最新鲜的红酒,当然是自己酿造的。自己弄得热包子比大厨的冷包子好吃。
哈哈!
努力工作,尽情享受!
呵呵,享受生活的人当然也是勤劳的人。自己酿制确实非常有趣味而且能享受整个过程,等到最后葡萄酒入口的时候,那种幸福感立刻升华。
CHEERS!FOR THE BEAUTIFUL LIFE!
自酿的葡萄酒,以果香果酸明显、口感清新见长;论滋味丰富,还得人家法国葡萄酒。
分享 交流 | 细细品味 多多珍爱 | 最好的咖啡就是最新鲜的咖啡 | 自家烘焙最新鲜
尊重每一种咖啡 云南咖啡 蓝山 可那 曼特宁 摩卡 哥伦比亚 巴西 爪哇 园豆 平豆…
崇拜ing,决定明天去买葡萄酒自酿
买不到葡萄,只好用了红提。。。不知。。。。。
Homemade Wine Tutorial:
A Step-by-Step Guide to Making your First Wine
Introduction
Making wine is one of the most enjoyable hobbies I can imagine. How often do you find a hobby that allows one to transform something like fruit into another substance so different from its original like winemaking does? This tutorial attempts to demystify making wine by walking you through the process of making your own apple juice wine. Making wine is neither hard nor complex. The basic steps can be broken to:
1. Create an environment the yeast likes and thrives.
2. Allow the yeast to consume as much as of the sugar as you wish.
3. Stop the yeast from growing after the desired amount of sugar has been consumed.
4. Bottle the wine.
5. Allow the wine to age.
6. Drink it.
Now this is an incredibly simplistic way of looking at making wine, but it is basically that easy. However, before I demonstrate each of these steps, I feel it is important to have a fundamental understanding of the chemicals and hardware used throughout this tutorial, and winemaking in general. First, we will examine the chemicals/additives.
Chemicals / Additives
When one hears the words “chemicals” or “additives” one may think of poisons or undesirable substances such as the ubiquitous “Yellow #5” found in almost everything. Fortunately, the additives used in the wine making process are completely safe and used to enhance as well as extend the life of the wine.
Strictly speaking, one can make wine without any chemicals. However, I would not recommend it. Each of the additives serve a specific purpose, and without them, the quality of the wine would suffer. In this part of the tutorial, I will examine each of the chemicals in the Apple Wine recipe used for this tutorial.
Sulfite Solution
Technically speaking Sulfite Solution is really a powder called Sodium Metabisulfite added to water. It is a substance commonly used to sanitize anything that comes into contact with the wine during the entire winemaking process.
Please note When I say “anything that comes into contact with the wine,” I do mean everything. Cleanliness is the most important edict in making wine.
To make the Sulfite solution, add once ounce of Sulfite Powder to one US Gallon of cool water and shake vigorously for a few minutes. Do not use hot or warm water
Pectic Enzyme
Pectic Enzyme helps break down pectin present in the fruit being fermented. For those of you who have made jams or jellies, you may recall pectin is one agent used to help solidify fruits, transforming them into a jam or jelly. Without Pectic Enzyme, it would be virtually impossible to break down the naturally occurring pectin resulting in a wine that looks hazy. Pectic Enzyme also serves as a juice extractor. Pectin is found in the cellular walls of fruit. Pectic Enzyme helps break down the cellular walls, increasing the amount of juice extracted from the fruit.
Acid Blend
In winemaking, there are three basic types of acid: Tartaric, Citric and Malic. Acid Blend is a combination of these acids to help add fruity character and sharpness to wine. Too little Acid Blend, the wine could have a flat taste and lack character. Too much, the wine could have an undesirable sharpness that might do away with further aging. Then again, it might not.
Yeast Nutrient
Strictly speaking, Yeast Nutrient can be considered “super food” for the yeast. Often yeast needs something to help it along for a short period of time at the beginning until it can consume the sugars in the wine completely on its own. This is the sole purpose for Yeast Nutrient. Do not get this confused with Yeast Energizer. Yeast Energizer could be considered “super, super food” and should only be used in specific circumstances such as when you are having problems getting something to ferment. Adding Yeast Energizer will force the yeast to grow.
Tannin
Tannin is a substance found in grape skins, seeds, stems and oak barrels (known as wood tannins). Because of this, red wines tend to have higher amounts of tannins than white wines. Tannins also contribute astringency (that pucker feeling when you drink a dry wine) and/or bitter flavors to wine. Tannins also act as a natural preservative, aiding in the aging process.
Campden Tablets
Campden Tablets are small tablets containing about 450 mg of potassium (or sodium) metabisulphite. What on earth do you need potassium metabisulfite for and what is potassium metabi-whatever? Well, one of the golden rules in winemaking is “Cleanliness is next to Godliness.” I mean this literally. Anything that touches the wine before, during, after and bottling must be spotless. Campden Tablets are simply the most common of the many sterilizing agents used to kill any “bad” bacteria that exists in the wine before you add “a good fungi” (the wine yeast). This insures you start the wine with a clean slate. Free of anything that could cause bad flavors or ruin the wine.
Wine Yeast
Wine Yeasts are a special type of yeast used only in making wine. Just like regular bread yeast, wine yeast consumes sugar then produces alcohol and carbon dioxide gas as a by-product. There are countless types of Wine Yeasts; each imparting different qualities. The most common yeasts include: Flor Sherry, Montrachet, Pasteur Champagne, Premier Curvee, C矌e des Blancs, etc. One package of yeast will product up to five gallons of wine.
Potassium Sorbate
Stabilization of a wine is one of the last steps in the winemaking process. As stated earlier, carbon dioxide gas is a by-product of the fermentation process. Stabilization inhibits (does not kill) the yeast, preventing any additional CO2 gas from being generated. Without stabilization, the wine will continue to ferment in the bottle; potentially leading to exploding corks and a real mess. Before you start freaking out, the bottles themselves should be fine. It’s the corks that will blow out before the bottle blows up. Potassium Sorbate is one of the many different types of stabilization agents used to inhibit the yeast and put them into hibernation. It is highly recommended you add a stabilization agent to every wine before bottling it; regardless what the recipe says. It’s just good practice.
Hardware
The most expensive aspect of making wine is the hardware. Fortunately, all of the hardware, except for labels and corks can be reused again and again. One very important thing to remember is to only use food-grade materials when making wine. Materials not marked as food-grade can contain chemicals that could leech out into the wine during fermentation. While I have never know anyone to get sick, I would simply not risk it. Food-grade materials do not possess such chemicals and are specifically designed to be used with food materials. Therefore, don’t skimp out and buy a big trash can thinking it’s a substitute for a high quality food grade bucket. Spend the extra bucks on a really good one. You won’t regret it. Now let’s get on with explaining the hardware.
Carboy
A Carboy is simply a glass jug. That’s all, nothing fancy. Carboys come in sizes ranging from One Gallon US to Six Gallons US.
Please note
I specifically mention “US” in my previous sentence. This stands for United States (US) measurements as opposed to United Kingdom or Imperial measurements. Some recipes require US measurements where as others use Imperial measurements. You may think they are the same, but they are not. For example, a Five Gallon Imperial carboy is the equivalent of Six US gallons. Therefore, read your recipes carefully.
Bung
bungs are nothing more than rubber stoppers with holes drilled down the middle where an airlock (I will explain that later) is attached. They come in various sizes and are inserted in the mouth of the carboy during the secondary fermentation phase (I will explain that later as well).
Airlock
The bane of every winemaker is oxidation. Oxidation is the breakdown of the wine due to over exposing it oxygen. Airlocks help prevent this from occurring by creating a “valve” where CO2 gas from the fermenting wine is allowed to escape while at the same time keeping air from entering the carboy and oxidizing the wine. Airlocks work in conjunction with bungs by being inserted in the hole of the bung and then the bung is inserted in the mouth of the carboy.
There are two basic types of Air Locks; one looks sort of like a “S” the other looks like a small cup with an inverted cup floating inside it. They work by filling them half-way with water. The pressure of the water in the airlock keeps air from entering the carboy while also allowing air to escape; prevent oxidation. It’s kinda cool watching them bubble as the wine ferments.
Personally, I prefer the “S” shaped airlocks. They are easier to use any have no additional parts that could get lost; unlike the other “double cup” type Air Locks.
Hydrometer and Hydrometer Tube
An important part of making wine is measuring the amount of sugar before, during and after fermentation. This is done with a Hydrometer and Hydrometer Tube. The Hydrometer looks sort of like a 12 inch thermometer with a piece of paper stuck inside of it with numbers printed on it. To use it, you put a small amount of the wine in the hydrometer tube, drop the hydrometer in the wine and spin it. The spinning action removes any bubble that may have accumulated on the sides of the hydrometer. The hydrometer will float in the wine giving you a measurement of the sugar in the wine. To read the measurement, look at the number inside the hydrometer where it’s floating on the wine. That is the level of sugar currently in the wine.
Please note
The standard measurement used with hydrometers in winemaking is one called Specific Gravity. Almost every recipe uses it, and every hydrometer will have Specific Gravity, or SG as it is commonly referred to, printed on it. To make matters even more confusing, most Hydrometers also have two or three other measurement systems printed on them. They are Balling, Brix, and Potential Alcohol. I would ignore Balling and Brix, but I would keep the Potential Alcohol measurement in the back of your mind. This can be helpful in determining the amount of alcohol in a finished wine.
Wine Thief
A Wine Thief is a glass or plastic tube with holes a both ends used to extract small amounts of the wine. To use it, insert it into the wine. Allow it to fill with wine. Cover the hole exposed towards you with your thumb. Remove the Wine Thief. You now have a small amount of the wine ready to be used. A Wine Thief is not an absolute necessity for making wine, but it is very helpful. An immaculately clean turkey baster makes a suitable replacement for a Wine Thief.
Drawing of a basic Wine Thief.
A clean turkey baster works great as a replacement.
Food-Grade Bucket and Spoon
As I stated before, it is imperative you use materials labeled as food-grade. This insures no nasty chemicals worm their way into the wine during the fermentation process. So what size do you need? That depends on the amount of wine you are producing. For a one gallon batch, I would use a three to five gallon bucket. Fermenting things can create a lot of foam and you need a vessel large enough to hold the wine and the foam.
Where can you find a food grade bucket? My favorite place is my local wine supply shop. Unfortunately, not all of us have that level of convenience. Fear not, you still have a couple options. One is to go to your local discount store such as K-Mart, Wal-Mart or Target. All should have buckets suitable for winemaking. Another option, and free one at that, is to visit your local grocery store. They literally have dozens of buckets in the bakery section, and many grocery stores are more than happy to give you a few. However, make sure you verify they bucket(s) were only used to store food products and not any nasty cleaning solutions. Then take them home and run them through a dishwasher cycle. Don’t have a dishwasher? No worries, just clean them out by hand at least two or three times with a super generous amount of soap and very hot water. It’s imperative you have them absolutely free of all debris and all food particles.
Food-Grade Racking Tub and Hose
Racking is the process of transferring wine from one vessel to another. Why do such a step? As a wine ferments, sediments will drop to the bottom of the container holding the wine. This is mostly lees (dead yeast). You must keep the wine off the lees or it will add off flavors to the wine. Racking is a simple process of siphoning the wine from one carboy to another using a racking tube and hose. The tube is a straight stiff piece of plastic tubing curved at the top where you connect a piece of flexible hose. The tube goes into the carboy containing the wine and you literally suck on the other end of the flexible tubing until the wine starts flowing into the clean, empty carboy. Sounds gross but it’s really not.
Making Wine:
Step One – Sanitize EVERYTHING
Supplies needed:
One gallon glass jug
1 oz Sulfite powder
Three to five gallon food-grade bucket
Food-grade plastic spoon
The first step in making wine is to prepare the sulfite sanitizing solution (This step can be skipped if you already have a sulfite solution prepared). Add one ounce of Sulfite Powder to one US gallon of cool water and shake vigorously for a few minutes or until the powder has completely dissolved. The solution stays effective for months if stored in a tightly sealed container in a cool/dry place.
Pour some of the sulfite solution in the bucket. Swish the solution around covering every inch of the inside of the bucket. Now, dip the spoon into the sulfite solution in the bucket.
Please note:
The point of this step is to sanitize all of the hardware used before we start making the wine. This step must be repeated every time you use a piece of hardware that touches the wine.
Once the hardware has been properly sanitized, toss the solution.
Please note:
Do not rinse the hardware with water. Doing so, will expose the hardware to bacteria again; ultimately defeating the purpose of the sulfite.
Step Two – Preparing the Must
Supplies needed:
1 quart measure vessel
Pot that holds two quarts
Plastic trash bag
Butcher’s twine
3 quarts fresh pressed cider or apple juice, no preservatives
1 quart water
1 1/2 lbs sugar (approx Three cups)
1 tsp acid blend
1/4 tsp. tannin
1 tsp yeast nutrient
1/2/ tsp pectic enzyme
1 campden tablet
Start preparing the Must by first selecting the correct type of apple juice or cider. Make sure you select one that has:
1. No preservatives
2. Organic
3. Free of pesticides
Sanitize the one quart measuring vessel, measure three quarts of the juice and put in the primary fermenter (the big bucket). Next, mix the water and sugar together in a pot and heat until boiling. Once the sugar has completely dissolved, pour the sugar water solution over the apple juice. Then add the Acid Blend, Tannin, and Yeast Nutrient.
Please note:
Be careful when adding the tannin. It tends to “clump up,” sometimes making it difficult to disperse in throughout the must.
Allow the must (unfermented wine) to cool completely to room temperature. Once the must has cooled sufficiently, crush the campden tablet with the back of a spoon, add to the must and stir. Cover the primary fermentor with a plain old plastic bag and secure tightly with some butcher’s twine. Now, allow the must to rest overnight. During this time the campden tablet will kill any nasty bugs in the must. The next day, add the Pectic Enzyme to the must and stir. You are now ready to measure the Specific Gravity/Potential Alcohol and confirm you have the proper amount of sugar in the must.
Step Three – Measuring the SG and PA
Supplies needed:
Hydrometer and Hydrometer tube
Wine thief
Sulfite solution
Sugar is the heart of all yeast fermentation. Yeast consumes the sugar and produces alcohol as the by-product. Therefore, the higher the sugar content, the more alcohol can be produced. Conversely, the lower the sugar the less alcohol can be produced. Specific Gravity (SG) and Potential Alcohol (PA) readings provide you with ability to measure how much alcohol is possible in the must. However, a baseline measurement must be taken before any fermentation starts. After you have taken your baseline reading, your goal should be to make the must ferment out to a SG reading of .990 or less (same as less than 0% PA). Meaning, no more alcohol can be produced. Since no more alcohol can be produced, the baseline PA reading is the alcohol content within the wine. The simplicity of the PA system is why I really like it. Unfortunately, the PA system is not as accurate as the SG system and most wine recipes use Specific Gravity. Therefore, I use both and have the best of both worlds.
Below is a chart I designed showing the measurement conversions between SG and PA.
SG PA SG PA
1.150 20% 1.068 9%
1.143 19% 1.061 8%
1.136 18% 1.053 7%
1.128 17% 1.046 6%
1.121 16% 1.038 5%
1.113 15% 1.030 4%
1.106 14% 1.023 3%
1.098 13% 1.015 2%
1.091 12% 1.008 1%
1.083 11% 1.000 0%
1.076 10%
To begin taking the SG/PA measurements, first sanitize the hardware by completely submerging it in the Sulfite Solution then discard the solution.
Now that the hardware is clean and sanitized, insert the wine thief in the must. Wait for the thief to fill. Once filled, cover the hole facing you with your thumb and remove it from the must. The wine should stay in the thief. Now place the tip of the thief in the Hydrometer Tube and release your thumb. Carefully lower the hydrometer into the tube. Do not drop it or it will probably break. Continue adding more and more must until the hydrometer floats freely in the tube. Now, spin the hydrometer in the tube. This releases any bubbles that may have formed around the hydrometer. Once the spinning has stopped, carefully look at the point where the hydrometer is floating.
Please note:
The capillary effect will cause liquid to “bend upwards” on the sides of the hydrometer. Do not mistake the top of this “bending” as the right reading. Instead carefully examine where the bottom of the curve is located. This is the correct measurement. Please see the picture below for an example.
How to correctly read a Hydrometer
Once you have and accurate SG reading, write it down. For this recipe, you should have a SG reading between 1.076 to 1.098 (10% to 13% PA). You are now ready to add the wine yeast and start the fermentation process.
Step Four – Primary Fermentation
Supplies needed:
Wine Yeast of your choice
Hydrometer and hydrometer tube
Food-grade plastic spoon
Sulfite solution
There are loads of different kinds of wine yeasts, each contributing different attributes to wine. For simplicity I recommend you use Premier Cuvee for this recipe. However, feel free to use any of the other basic wine yeasts such as Flor Sherry, Montrachet, Champagne, etc.
Sprinkle the yeast over the must and stir it with a sanitized plastic spoon.
Please note:
Do not use any wooded utensils in your winemaking. They are prone to bacterial growth due to their porous nature. Stick with plastic. It’s easy to clean and cheap to replace.
Stir the must daily with a sanitized spoon for one week. After one week, check the SG/PA. It should have a SG/PA reading of between 1.024 1.030 (3% to 4% PA). If it the must has not reached the proper reading, then wait another 2 to 3 days and take another reading. Once the must reaches 1.024 to 1.030, you are now ready to move to the Secondary Fermentation Stage.
Step Five – Secondary Fermentation
Supplies needed:
Racking tube and hose
One Gallon glass carboy
Bottle of inexpensive, but drinkable, white wine for topping off
Sulfite Solution
Bung / Airlock
Secondary Fermentation is a “closed” fermentation process where the must is allowed to continue to ferment while exposed to as little air as possible. To achieve this, one must first transfer the wine to a different fermentation vessel. The vessel of choice is a glass carboy. Carboys are nothing more than big glass jugs. Since this recipe produces only one gallon of wine, you can use any basic, run of the mill glass jug (such as the one the juice came in).
Please note:
Do not use a plastic jug for this step in the winemaking process. Plastic is perfect for spoons, hoses etc, but is not recommended for secondary fermentation. If you have to, buy a glass jug.
Once you have your carboy you will need to start racking your wine into the carboy. Racking is basically siphoning the must from the primary fermenter to the carboy. This requires you purchase a racking tube and hose. A racking tube is a stiff piece of plastic bent at the top where you attach the racking hose.
Please note:
This piece of hardware should be purchased from a winemaking shop. Other types of hoses are not classified as food-grade, and as I have stated earlier you should only use food-grade materials when making wine.
To start racking the wine, open a bottle of inexpensive, but drinkable, white wine at room temperature and set aside (water boiled and cooled to room temperature works as a substitute). Now, place the primary fermenter on a flat surface at least three off the floor (such as the kitchen counter). Next, clean the carboy out really well; making sure no particles are visible. Sanitize the carboy by pouring some sulfite solution in it and swish it around making sure the entire surface has been covered. Discard the solution. Next, sanitize the racking tube and hose by submerging them in the sulfite solution. Once everything has been sanitized, put the carboy on the floor, insert the racking tube in the primary fermenter and suck, yes suck, on the other end of the racking hose. Once the wine starts flowing, put the hose in the carboy. Once most of the must has been transferred, carefully watch what is left in the primary fermenter. There will always be some really nasty looking stuff left in the fermentor. It is better to leave that behind rather than try to get every drop. Now take the white wine (or boiled, then cooled water) you set aside earlier and fill the carboy up to about 1 1/2 – 2 inches from the top. Lastly, submerge the bung and airlock in the sulfite solution, fill the airlock with water up to the fill line printed on it and insert it into the mouth of the carboy.
Allow the wine to continue to ferment in the carboy for several months until the SG/PA ferments out to .990 or less (same as less than 0% PA). This usually takes about six months. Make sure to check the air lock often and replace the water as it evaporates. Also, rack the wine every couple of months or when you see a large amount of sediment at the bottom. Use the same steps as above whenever you rack your wine.
Please note:
It is very important to watch the level of lees, or sediment, at the bottom of the wine. Neglecting to rack your wine could allow bad things to happen such as off tastes and odors caused by the lees. Conversely, you do not want to rack the wine too often as this will make it prone to bacterial exposure which is very bad. Every two to three months is usually more than sufficient.
Once your wine has fermented out (reached a SG/PA of .990 or less) you can proceed to the last step, Stabilizing, Bottling and aging.
Step Six – Stabilization, Bottling and aging
Supplies needed
1/2 tsp. Potassium Sorbate
Sulfite Solution
Five standard wine bottles
10 Number 8 Natural Corks
One to three gallon primary fermenter
Food-grade plastic spoon
Corker
Labels
Racking tube and hose
The final step in making your wine is stabilizing it, bottling it and allowing it to age. Begin by soaking the corks in water for at least eight hours.
Please note:
You really do not need 10 corks. I included extras because you never know when a mistake is made and it’s better having a few extras around just in case.
Stabilization
Next, clean the wine bottles thoroughly. Then swish sulfite solution in them and discard the solution. Then sanitize the racking hose, tube, primary fermentor and plastic spoon (discarding the solution afterwards). Rack the wine into the primary fermentor. Add 1/2/ teaspoon of potassium sorbate to the wine and stir. Potassium sorbate is a yeast inhibitor that keeps it from continuing to ferment while in the bottle. Do not skip this step. If you do not stabilize your wine, it will continue to ferment in the bottle, increase the pressure inside the bottle ultimately causing the cork to blow out. Adding the potassium sorbate takes just a few seconds and is well worth the peace of mind.
Please Note:
The bottle will not explode. Only the wine will blow out of the top. I guess it’s possible the cork could hit someone and hurt them, but that is highly unlikely.
Bottling
Now that the wine has been properly stabilized, rack the wine into the bottles leaving about two inches of free space at the top.
Please note:
Just like previous steps, do not try to get every last drop of the wine in the bottles. There will always be some sediment on the bottom of the carboy, do not bother with it.
After all the bottles have been filled you will need to cork each bottle. Now, there are many different kinds of corkers and I cannot possibly explain how they all work. Therefore, I will leave those instructions up to the manufacturers.
Now that all the bottles have been corked, add your labels. Personally, I add labels to every wine I make. The design may be secondary, but it’s important to have at least the following on every label:
1. Name of the Wine
2. Month/Day/Year it was bottled
3. Alcohol by Volume
aging
I like to allow my wine to age for at least six months before I drink it. To age properly, store the wine on it’s side in a cool, dry and dark place like your basement or crawlspace.
That’s it. Enjoy your wine.